What Is a Heat Gun Used For?

A Heat Gun is a handheld tool that directs a controlled stream of hot air onto a small area. It can soften old paint, shrink heat-shrink tubing, loosen adhesive, and help shape certain plastics. The results depend on temperature, airflow, distance, and steady movement—not simply on turning the tool to its highest setting.

Heat-tool specialist Alex Morgan offers a useful rule: “Let the heat do the work; keep the nozzle moving.” This is a guiding reminder, not a substitute for the manufacturer’s instructions. Hold the tool too close, or pause over one spot, and a surface can blister, discolor, or become dangerously hot. Even a short task deserves care. Nearby curtains, paper, and dust can catch heat; the nozzle and workpiece may stay hot after the tool is switched off.

This guide explains what a Heat Gun is used for, which jobs suit it, and how to approach common tasks with control. You’ll find examples around a home workshop, from softening stubborn labels to loosening paint for careful removal. A heat gun is useful, but it is not a magic fix. Some materials react unpredictably, and rushing can make a small job worse. That part is easy to forget. Check the surface, test a discreet area, and follow the tool’s safety directions before starting.
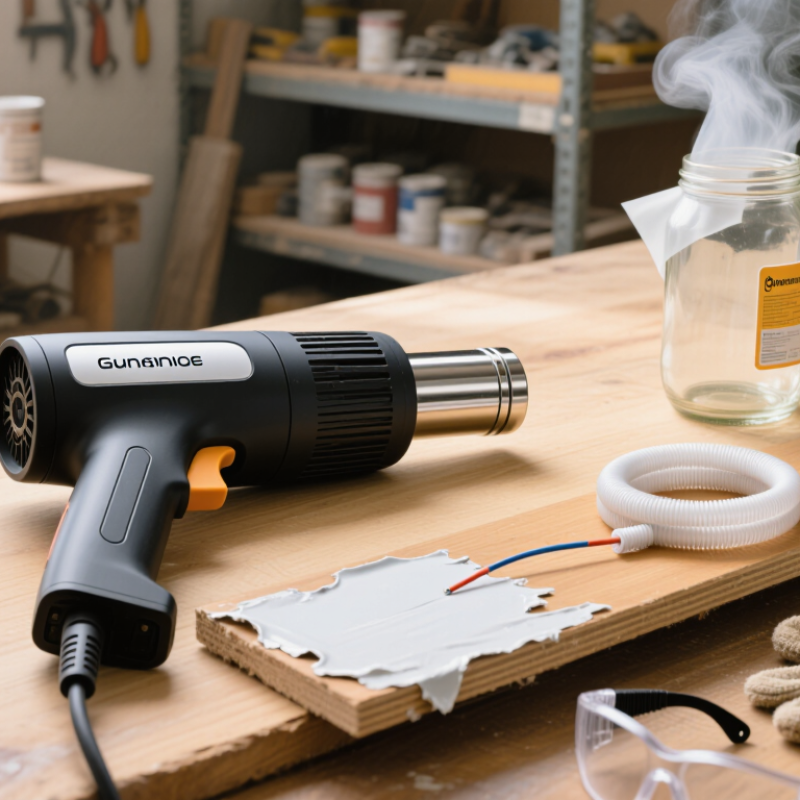
What Is a Heat Gun Used For?

What a Heat Gun Is and How It Generates Hot Air

A heat gun is a handheld electric tool that sends a controlled stream of hot air toward a surface. Inside, an electric heating element warms the air while a small fan draws air through the tool and pushes it out of the nozzle. No flame is needed. The narrow opening concentrates the airflow, much like a small, steady gust aimed at one spot. Many models let users adjust temperature or airflow, though the controls and range vary.

The air cools as it moves away from the nozzle, so distance matters. Hold the tool closer, and a small area heats quickly; move it back, and the warmth spreads more gently. A few inches can make a real difference. Heat guns can soften paint, shrink heat-shrink tubing, or loosen some adhesives, but the material’s limits matter. Plastic may warp, and nearby surfaces can scorch before they look hot. Keep the nozzle moving and test an inconspicuous area when possible. It is easy to underestimate how quickly heat builds up. That deserves a second thought.

Common Materials and Tasks a Heat Gun Can Handle

A heat gun directs concentrated hot air, making it useful for tasks that need controlled softening rather than an open flame. On painted wood, it can loosen old coatings for careful scraping; on plastic, gentle heat can help shape thermoplastic parts. It also shrinks heat-shrink tubing, softens stubborn adhesive, and warms decals before removal. Small jobs are easier. Still, heat travels quickly, and a surface can scorch before it looks damaged.

For paint removal, the U.S. Environmental Protection Agency’s Renovation, Repair and Painting Rule prohibits using heat guns above 1,100°F when disturbing lead-based paint. That threshold matters in older homes, where paint may contain lead. A heat gun can also damage nearby wiring, glass, or finished surfaces, so check the material’s temperature limits and keep the nozzle moving. It is useful, not foolproof.

Tips: Start with the lowest effective setting and test an unseen spot. Keep the gun several inches away; use a scraper only after the coating softens. Wear eye protection and work with ventilation. Avoid heating unknown plastics, which may release irritating fumes. I still find that patience beats extra heat.

What Is a Heat Gun Used For? - Common Materials and Tasks a Heat Gun Can Handle

Material or Item Common Task Typical Heat Approach Important Precaution
Heat-shrink tubing Shrinking tubing around wire splices and cable connections Use a low or medium setting; move the airflow evenly around the tubing. Keep the nozzle moving and avoid overheating the wire insulation or nearby components.
Painted wood Softening paint before scraping it from a surface Apply gentle, moving heat until the paint softens, then scrape carefully. Older paint may contain lead. Do not heat suspected lead-based paint; follow appropriate testing and removal guidance.
Adhesive labels and stickers Loosening adhesive to help remove labels or decals Use low heat in short passes and test a small, inconspicuous area first. Heat can damage finishes, coatings, or the surface beneath the label.
Plastic film and packaging Shrinking suitable shrink film around an item Use low heat and keep the gun at a safe distance, following the film instructions. Plastic can melt, distort, or release irritating fumes when overheated. Provide good ventilation.
PVC or other plastic pipe Softening compatible pipe for shaping or repair work Use controlled, gradual heat only when the pipe manufacturer's instructions permit it. Not all plastics are suitable for heating. Avoid overheating, which can deform material or produce harmful fumes.
Wood and damp surfaces Speeding up drying of a small, localized area Use low heat with continuous movement and allow the material to cool between passes. Heat guns do not replace proper drying methods. Excessive heat can scorch wood or create a fire hazard.
Frozen metal fittings or locks Applying gentle warmth to help thaw ice Use low heat and warm the surrounding area gradually. Keep heat away from flammable materials, seals, and sensitive finishes; never use an open flame as a substitute.
Electronics and circuit boards Specialized rework, such as loosening certain components or connectors Requires controlled temperature, suitable airflow, and an appropriate nozzle. A general-purpose heat gun can quickly damage components or boards. Use equipment and procedures designed for electronics work.

General safety: Heat guns produce very hot air. Wear appropriate eye and hand protection, keep the tool moving, maintain a clear work area, and follow the tool and material manufacturers' instructions. Temperature and airflow requirements vary by tool and material.

How Heat Gun Nozzles and Temperature Settings Affect Use

A heat gun’s nozzle shapes where its heat goes. A wide, flat nozzle spreads airflow across paint or a broad plastic sheet. A reducer nozzle concentrates it on a narrow seam, so nearby surfaces can overheat quickly. A reflector nozzle wraps heat around pipes and tubing. Keep the nozzle moving; a stationary stream can blister paint or deform plastic before the surface looks dramatically hot.

Temperature settings matter as much as nozzle choice. Start low, then raise the setting gradually while testing an inconspicuous spot. Low heat can soften labels or shrink tubing; higher heat may help loosen stubborn coatings, but it also increases scorching and fire risks.

There is no universal setting for a material: thickness, distance, airflow, and room conditions all change the result. I still find temperature easy to misjudge.

That deserves attention.

NIOSH’s 2016 Criteria for a Recommended Standard on occupational heat uses the Wet Bulb Globe Temperature method, which accounts for humidity, air movement, and radiant heat alongside air temperature. It concerns workplace heat exposure, not heat-gun settings, but it reinforces an important point: the surrounding conditions affect risk.

Work in a ventilated area, wear eye protection, and keep the hot nozzle away from cables and combustible surfaces. Let the tool cool on a heat-resistant stand. Never assume “low” means harmless.

Steps for Using a Heat Gun Safely and Effectively

What Is a Heat Gun Used For?

A heat gun directs concentrated hot air to soften adhesives, shrink heat-shrink tubing, loosen old finishes, or bend some plastics. Its output can become extremely hot, so treat it like a serious workshop tool, not a hair dryer. Check the material’s instructions first; some plastics release harmful fumes when heated. Never use a heat gun on paint that may contain lead.

Steps for Using a Heat Gun Safely and Effectively

Work in a well-ventilated area, away from paper, solvents, and other flammable materials. Wear safety glasses and heat-resistant gloves, and secure the item on a stable surface. Inspect the cord and nozzle before plugging in. Select a low setting, then test a small, hidden area. Hold the nozzle at the distance recommended in the manual, and keep it moving to prevent scorching or melting. Keep it moving. Avoid aiming at people, your hands, or the power cord. If the surface smokes, changes color, or smells sharp, stop and let it cool. I’ve found that rushing the test patch is an easy mistake to make.

Tips: Keep a clear space around the work area. Use pliers for small pieces rather than holding them near the nozzle. Afterward, switch the tool off, place it on its stand, and let it cool fully before storing. Never leave it unattended while plugged in.

Key Risks and Limitations of Heat Gun Applications

A heat gun can soften paint, shrink tubing, loosen adhesives, or help bend certain plastics. Its risks are easy to underestimate: the nozzle can exceed 500°C, while hot air may ignite dust, fabric, or vapors without direct contact. Burns happen quickly. Old coatings may release hazardous fumes when heated, so identify the material before starting. A heat gun is not a substitute for ventilation, protective equipment, or a suitable tool for delicate surfaces.

Fire risk is not theoretical. The NFPA’s Fire Loss in the United States During 2023 report estimated 1,389,000 fires and 3,670 civilian fire deaths. Those figures are not specific to heat guns, but they show why ignition control matters. Heat guns also have limits: airflow can be uneven, nearby components may warp, and overheating can damage wiring or scorch wood. Results depend on distance, movement, and temperature; even careful work can leave a hot spot you did not notice.

Tips: Clear a wide, dry work area, keep the gun moving, and test a hidden spot first. Use eye protection and ventilation. Unplug the tool before changing nozzles, and place it on a heat-resistant stand while cooling. Don’t use it near flammable liquids or suspected lead paint. A slower method may be the safer choice.

Article Source:

top